Pages

Thursday, November 28, 2013

Why I have the Ugliest Christmas Star


I have the world’s ugliest tree topper… And here’s why.

I love Christmas.  And I especially love decorating.  Everything looks so magical through the twinkle and glow of lights. However, Christmas decorating can be quite a stressful event for me. My type-A personality tends to creep up and often times makes me yell things like “You can’t put that garland there!” or “That ornament doesn’t match the theme!”

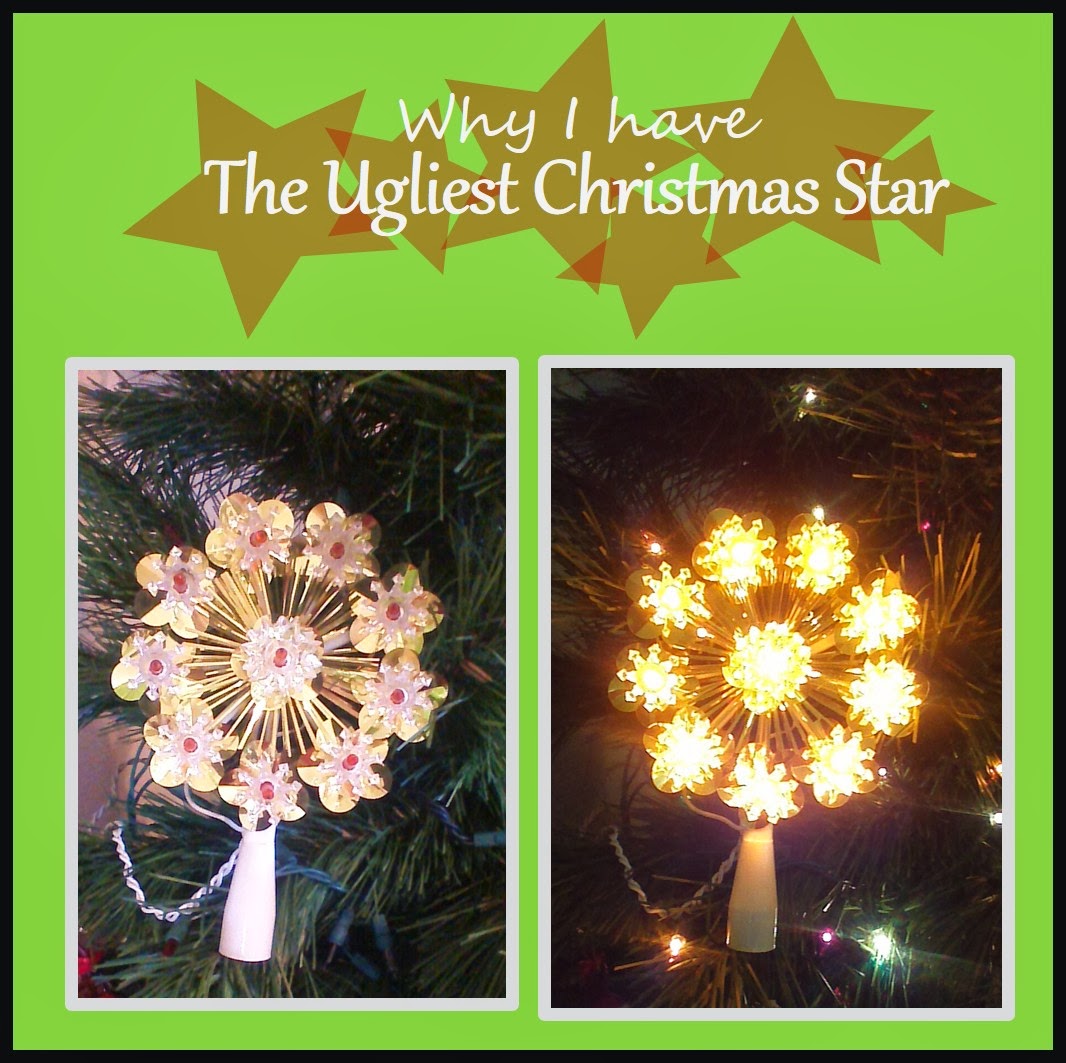
However, there is one Christmas decoration that graces our home every year that can be described completely and unabashedly hideous.  It doesn’t match any theme… it wasn’t handmade with love… it’s not a keepsake passed down from generations.  It is a Christmas star tree topper adorned with gaudy tinsel and plastic lights.  When the star is lit up, it glows like a beacon… there is no way to avoid noticing this little treasure. There was a poor attempt made to tear the price tag off the box it came in and what is left of the tag reveals that the tree topper is from the high-end luxury store, Family Dollar.

Despite the star’s obvious shortcomings, I can’t help but smile every year as I unpack the star from the box of Christmas decorations.  And I know that when the day comes that the little star stops working, I probably still won’t be able to part with it.

Several years ago, I was working at an after-school program for low-income and at-risk youth.  The community center that the program was held at was in a public housing apartment complex that primarily housed refugees.  This particular community center was the red-headed step-child of the community center family compared to its modern and well-funded counterparts.  It was nothing more than a large room with a sink, two fold out tables, and two archaic computers.  But that room became much more when everyone came together in it.

On Christmas Eve, a group of children came bouncing into the community center, yelling in Turkish and African accents, “Teacher! We got you present! We got you present!” They produced a poorly wrapped box and stood beaming from ear to ear as I unwrapped it.  The ugly star was staring back at me.  But as I looked up, I saw the faces behind the gift.  Their grins were uncontainable.  These children had nothing.  I can only imagine the excitement as they all pooled their little collections of coins and dollar bills and proudly marched into the dollar store to purchase their prize.

Every time I unpack that star and look at it, I don’t see the cheap plastic holding it together or the flashy gold tinsel, I see the contagious joy in the faces of those children that I was blessed to spend a year getting to know… those children that I will never forget.

And that is why, long after the star stops shining, I will continue to cherish it.  The star is a symbol of a lesson I learned from a roomful of children with ragged clothes and broken English. A lesson about the joy of giving and the humbleness of receiving.

Saturday, November 16, 2013

DIY Photo Christmas Cards on a Dime


I love the look of photo Christmas cards.  I always have so much fun searching the photo printing websites for the perfect one and waiting anxiously for them to arrive.  I found the perfect card that I couldn't wait to order.  Unfortunately the design I fell in love with was going to cost over $2.00 per card for the forty cards I needed. Sigh....

I searched a bunch of printing companies for a more affordable option, but I just couldn't find another design that I could really fall for.  Finally, I gave up and fiddled with the idea of just printing photos and making my own cards.  While looking into this option, I realized that I could have 5x7's printed for as little as $0.18 per photo!  Music to my ears!

So this year, I created my own photo cards that are original, beautiful, and affordable! And you can create your own too!  And no need for pricey photo-editing software!  In this tutorial, I will show you how to use Microsoft PowerPoint to create beautiful photo Christmas cards in twelve steps!

Keep in mind that different versions of PowerPoint will have slightly different settings or button locations, but all the basic functions will be the same no matter which version you are using.  I used Microsoft PowerPoint 2007 version… because, again, we have a shoestring budget and definitely don’t have the newest and greatest technology at our fingertips.  But the good news is this: You don’t always need the newest and greatest!  You can use what you have and create a masterpiece! 

12 Easy Steps to Create Your Photo Christmas Card:

Step One- Strike a pose and then download your picture to your computer.  Save it in your pictures folder on your computer
Step Two- Open Microsoft PowerPoint.
Step Three- Delete any pre-existing text boxes that may be on the slide.

Step Four- Insert your Picture: 
1. Select the “Insert” tab
2. Click “Picture” to add a picture from a file on your computer.


Step Five- Select Picture from Computer File
Select the picture from your My Pictures file and click “Insert”.  The picture should now be inserted into your PowerPoint slide.
Step Six- Explore the Picture Format Tab:   
Select the picture by clicking on it and then click the “Format” tab.  The tools available in this tab allow you to edit and change your photo.  Take a few moments to explore the options available.  I have highlighted the ones that I used below. 

Step Seven- Edit your Photo: 
Once you feel comfortable with the options available to you in the Format Tab, you can begin editing your photo.  I slightly cropped the edges of my photo and changed the color to a sepia tone.  I also slightly adjusted the contrast to make the twinkle lights in the background “pop”. At this point, my photo looks like this 


Now that the photo is edited, it is time to start creating the card.  This is where your creativity will kick in!  There is so much that you can do depending on the type of card you want.  In this tutorial, I am going to explain the process I used to create my photo card, but please know that the possibilities are endless when it comes to creating your card!
Step Eight- Add Text: 
To add text to your photo, Select the Insert tab and then click on “Text Box” and drag your cursor to create the text box.    

Type your text and then select the size, color and type of front.  For my card, I used four different text boxes. 

Step Nine- Create Layers:
To layer text boxes (or any other item for that matter) right click on the item, and a then select “Bring to Front” from the menu options.   

Step Ten- Group Everything Together: 
Once you have your card created and all the finishing touches made, you will want to group all the items together.  Hold down the control key as you right click on all the text boxes and the picture itself.   

Once all the items on the card are highlighted, let go of the control key and right click on the picture.  Select “Group” and then “Group” again.  Now that all the items are grouped, you will be able to move and re-size the picture and text as one whole piece.

Step Eleven- Size the photo: 
Right click on the photo.  Select “Size and Position”. 

Set the height and width of the picture to a standard printing size such as 4x6 or 5x7.  I set mine to 5x7 for printing purposes. 

Step Twelve- Save the picture: 
Now it is time to save your picture to you My Pictures file on your computer.  Right click on the photo and select “Save As Picture”.   

Select the file you wish to save your photo to.  Name the file.  From the “Save As Type” drop-down menu, select JPEG.  Click Save.


Your photo is now saved as a picture on your computer an you can upload it to any photo printing site.  I used Walmart.com for mine and had them printed as 5x7’s.  I had 40 cards printed for a total cost of only $23!

Merry Christmas and Happy Creating!

Thursday, November 7, 2013

Gift Idea: The Christmas Cash Challenge


My parents are evil geniuses.

On Halloween this year, they gave each of their children $150 dollars in cash. And along with the cash came these instructions: 

This is your Christmas gift from us.  You may use it however you want, but you must follow these basic rules: 
  1. The money must be spent on a want, not a need. 
  2. You can buy one thing or you can buy many. 
  3. You can add to the money if you wish, but you must spend the entire amount by Christmas.
  4. You cannot tell anyone what you spend the money on. 
  5. You cannot use the items you purchase until after Christmas. 
  6. Whatever you purchase must be kept a secret and wrapped up to be opened in front of everyone on Christmas Day.   
  7. $25 must be donated to a charity of your choice.

While being handed $150 sounds exciting at first, the truth quickly sets in: As if finding the perfect gift for everyone else wasn’t stressful enough, now I have to find the perfect gift for myself as well!  And my evil genius parents get to sit around enjoying a completely relaxing holiday season without the stress of holiday shopping.  Pure evil genius.  I only wish I had thought had thought of it first.

Let the challenge begin....

Saturday, November 2, 2013

Thrifty Halloween Costumes


My family had a little Halloween get-together this year. And because we all enjoy a good competition, we decided to have a costume contest.  To make it more challenging, the rules were as follows: No more than one item on your costume could be purchased new.  The rest of the supplies had to be scavenged, recycled, or purchased at a thrift store.  The results of the competition were very creative, thrifty, and fun!  I am featuring four of the ideas below.


Bucket List Costume
****Supplies Used****
Safari/Animal Print Dress ($6 from thrift store)
2 Hula Hoops ($1 each from dollar store)
Tomato Cage or heavy wire
Poster Board/Heavy Paper
Pictures or Magazine Cut-Outs
String or Ribbon
****Make It!****
This costume was made by securing two hula hoops together (one at the top of the "bucket" and one at the bottom). The hula hoops were secured together using the heavy metal wire from an old tomato cage that was cut apart.  Once the frame was constructed, it was covered with heavy brown butcher paper.  Cover the paper with picture of the places you want to visit and the things you want to experience in life. Tie string or ribbon around the hula hoops to create shoulder straps so the costume can slip on and off.


Fish Tank Costume
****Supplies Used****
Large Box
Black Duct Tape ($2.15 from Walmart)
Scrapbook Paper
Fishing Line
Crinkle Paper in Color of Choice
String or Ribbon
Blue Paint
Glue
Blue Shirt
****Make It!****
The cardboard box was cut to create the shape of the fish tank (see the pictures above for example).  The back of the box was painted to create the blue backdrop.  The top, bottom, sides, and edges of the box were covered in black duct tape to give it a shiny look (you could use black paint instead, if you prefer).  Crinkle paper was glued to the bottom of the tank to mimic colorful aquarium rocks.  The fish were drawn on scrapbook paper, colored, and cut out.  They were suspended using fishing line taped to the inside top of the box.  Shoulder straps were created by punching holes in the top of the box and running string through it.  Finish the look with a blue shirt and swim goggles.


Squirrel Costume
****Supplies Used****
Old Fur Coat ($10 from thrift store)
Furry Boots ($10 from thrift store)
Brown Pillowcase
Brown Leggings
Sewing Supplies
Old Magazines or Butcher Paper
Furry Hat with Ears ($12 from Walmart)
****Make It!****
To make the squirrel costume, a pillowcase was cut to allow arm holes and a head hole. For the tail, a pattern was drawn (freehand) on poster board and cut out.  The pattern was then traced twice onto an old fur coat and the pieces were cut out and machine sewn together, leaving the base of the tail open. The tail was then stuffed with crumpled magazine pages and butcher paper.  The tail was then hand stitched onto the pillowcase.  Arm straps can be made using ribbon to secure the upper part of the tail (the yellow arm straps in the picture were re-purposed from a pair of bumblebee wings from an old costume).  Finish off the outfit with a pair of ears which can be made out of remnant fabric from the fur coat and attached to a headband, or you can purchase a furry hat if you are short on time.  Finish the look with a burlap bag filled with peanuts!


"Wilson" Costume
****Supplies Used****
Cardboard Boxes
Fishing Hat
Flannel Shirt ($6.38 from thrift store)
Khaki Pants
Black Sharpie Marker
Bailing Twine
Glue
****Make It!****
Cardboard boxes were cut down to create the "fence" pieces and the pieces were glued together.  Sharpie was used to create the wood grain pattern.  The shoulder straps were made out of bailing twine and taped to the back of the fence (I told you we hold things together around here with bailing twine and bubblegum!).  Finish the look with khaki pants, a flannel shirt, and a fishing hat.  You will be ready to say "Howdy, Neighbor!" in no time!


I hope you enjoy these thrifty Halloween looks, and I hope they get your creative juices flowing!